Hexo 透過 Travis CI deploy 到Github page 失敗的處理
前陣子一口氣把 Hexo 的版本從 3.9.0 升級到 5.4.0 後,又換了一個很潮的 Blog 佈景主題 NexT,不過我到現在也還沒花太多時間來客製化這個佈景,光是把佈景換好,設定檔修改到可以正常運作就花我好幾個小時了,之後應該再多花點時間來研究怎麼調整設定讓整個 blog 更好看(其實原本的主題就滿好看了)。
不過似乎在接下來就遇到一些令人頭大的問題,原本執行的好好的 Travis CI,開使無法順利發布到我的 github page了,原本的作法已經夠奇葩了,當初還忘了把參考資料記錄下來,現在看了有點霧煞煞,當初怎麼會寫這麼複雜的做法。後來雖然改到可以透過hexo-deployer-git這個套件配合 hexo 的 _config.yml 的設定,讓我能夠在本機端執行 hexo deploy 來發佈到 github page,可是想透過 Travis CI 來處理就會失敗。
原本就想說,好吧!看來只好這樣了。沒想到幾週後,不死心的我又繼續找解決方法,好不容易真的找到其他人有類似的問題,而且他也記錄下他的解決步驟,不過我認真看了一陣子後,發現超出我理解範圍了,還是再找看看其他人的解決方法吧。
目前發布 blog 文章時,我用了兩個 github repo,一個單純用來寫文章的hexo-github-blog,在寫完文章後,透過 Travis CI 來重新產生靜態頁面、然後將產生好的 blog 資料夾 .deploy_git整包推到另一個 repo soarlin.github.io 上,這樣就可以讓我的 blog 在 github page 上面順利顯示了。
大致流程:hexo-github-blog >>> Travis CI >>> soarlin.github.io
錯誤 1. Permission denied
Travis CI 推送至 github repo 遇到 Permission denied
而實際在 Travis CI 執行時,執行到 hexo deploy 確實會執行 hexo-deployer-git 設定好的行為,但是最後會出現錯誤,錯誤訊息如下:
Warning: Permanently added the RSA host key for IP address '140.82.112.4' to the list of known hosts. |
看起來是因為Permission denied (publickey)這個問題造成無法順利從 Travis CI 推送到 soarlin.github.io 上,但是最後依然顯示 Done. Your build exited with 0.所以 Travis CI 不會有 build fail 的訊息通知,結果就是 Blog 變成一片空白。
解法: 使用 github token
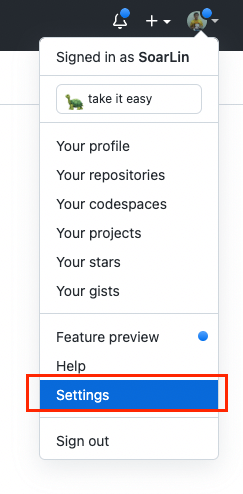
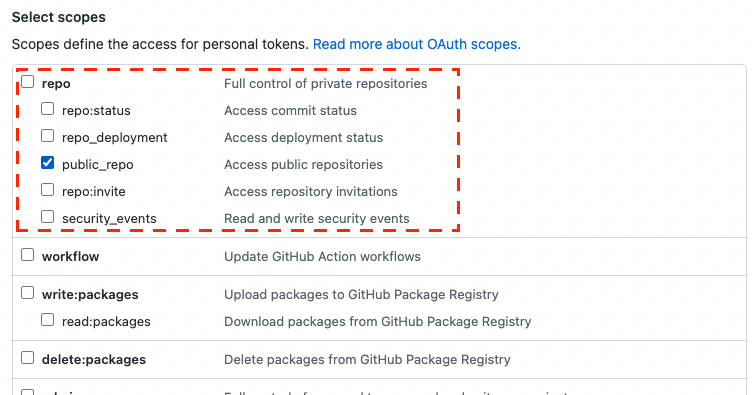
Github 官方文件上有教學怎麼建立 token,可以來參考這篇文章Creating a personal access token,但是在選擇權限範圍時,我想應該只要勾選public_repo這個應該就夠了,這樣已經可以存取 public repositories 了,如果還是不行,那至少把整個repo都勾選就好了。
Step 1
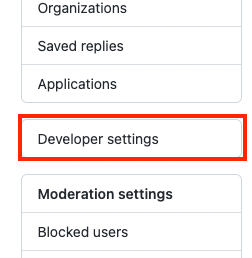
Step 2
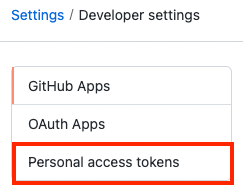
Step 3
Step 4
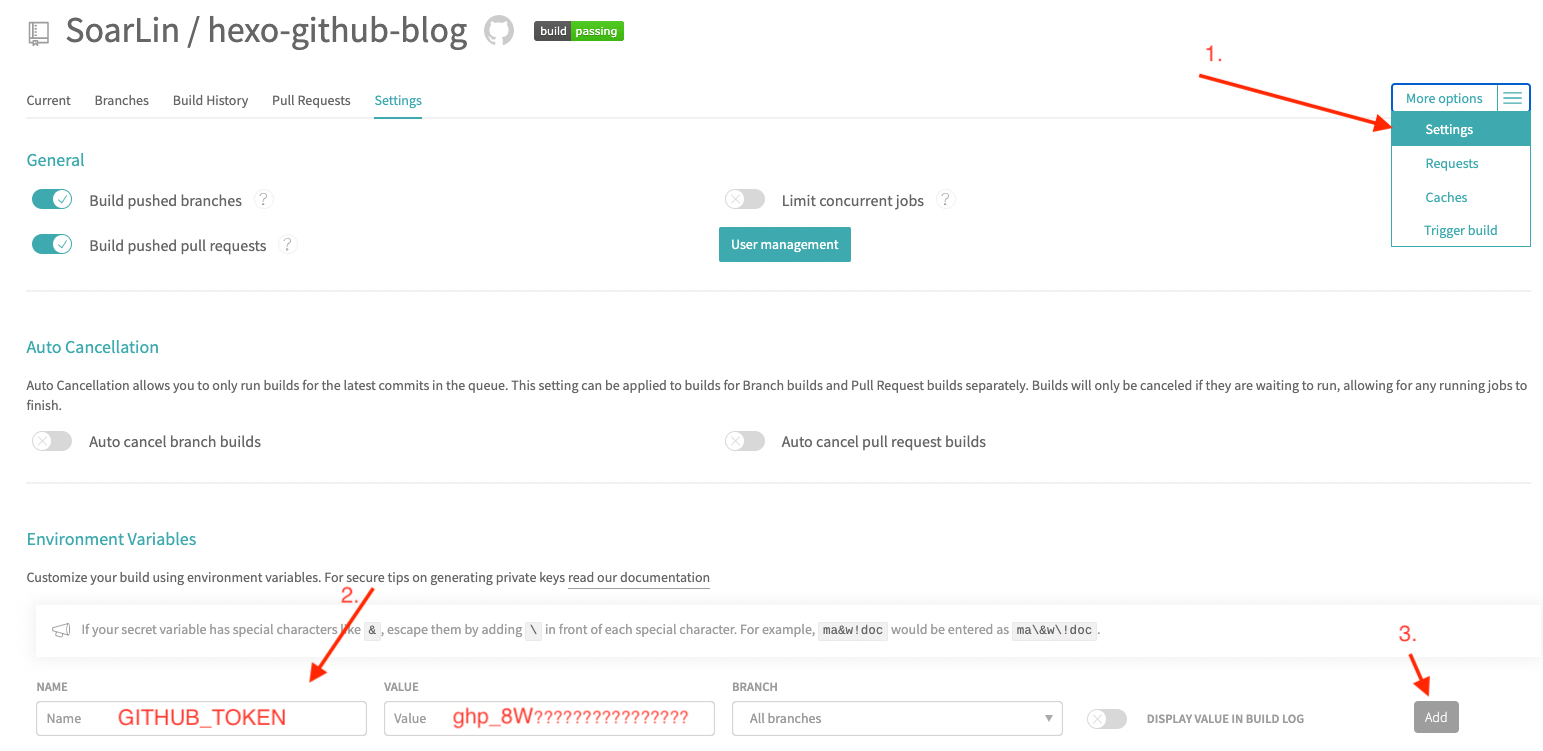
產生好 access token 後,請把他複製好到 Travis CI 上,找到你的專案,把 token 寫入專案設定中的環境變數,然後給定名稱就叫GITHUB_TOKEN吧,如下圖
然後再參考我的 .travis.yml 檔來寫吧!
language: node_js |
同學照抄的時候,記得把名字跟 email 改成你自己的,另外這邊將要 push 的 repo 另外用一個變數來替代,這樣同學抄完作業後,要改路徑也比較方便。而最重要的是 git push 的 repo 帶著剛剛建立的 access token,這樣才能順利的 push 到 repo 裏面。
git push --force --quiet "https://${GITHUB_TOKEN}@${GH_PAGE_REPO}" master:master |
錯誤 2. No layout
在 hexo generate 時,找不到 layout 頁面,造成無法正確產生 html 檔案,這樣就會出現錯誤訊息,如下
... |
解法: 透過 git clone 下載模板
而這個問題就比較快能夠推測到,就是雖然 package.json 裏面即使寫了佈景主題 hexo-theme-next,但是看起來在執行 npm install 時無法順利的安裝主題進來,這時候就改用 git clone 的方式,手動的提前將主題的檔案下載下來。
所以只需要在原本的 .travis.yml 檔案中加入下面的指令,就可以成功下載 NexT 的主題檔案,並在之後順利的產生 html 檔案了
git clone https://github.com/next-theme/hexo-theme-next themes/next |
其實上方參考的 .travis.yml 已經加在 before_install 裏面了。
等我都改好這些後,總算能夠順利的將我的 blog 文章發布出去了,真是令人內牛滿面啊~